


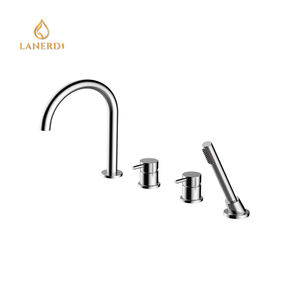

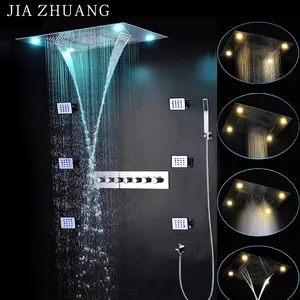


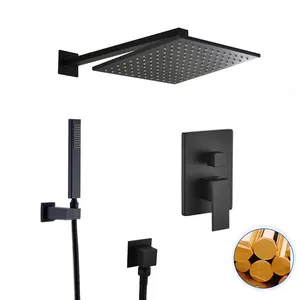
Hot sales Modern style luxury rv shower faucet panel faucet
Ready to Ship
$140.60 - $148.00
Min Order: 2 pieces
Shipping per piece: $23.72


The replacement RV shower faucet refers to a product used to replace or upgrade the existing shower faucet in an RV. It is purchased when the RV shower faucet is malfunctioning, worn out, or in need of an upgrade.
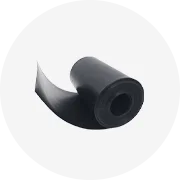
The design and dimensions of replacement RV shower faucets are typically matched to the model and installation requirements of the original RV shower faucets. Here are some common parts of replacement RV shower faucets. One important part is the replacement RV shower faucet O-rings, which are rubber rings installed at the connection between the pipes and the faucet body to prevent water leakage. Another crucial component is the replacement RV shower faucet cartridges, which control the water flow and temperature. It is typically made of ceramic or metal and is responsible for switching and mixing the water temperature.
Additionally, there are replacement RV shower faucet hoses that connect the faucet to the water source. The hoses are usually made of flexible materials such as rubber or stainless steel. Lastly, replacement RV shower faucet valve diverters can be used to replace damaged or non-functioning valve diverters. When the valve diverter has issues such as leaks, inability to switch water flow direction or uneven water flow, a replacement part can restore its normal functioning. The parts are essential for directing the water flow and ensuring even distribution. By replacing the components, the RV shower faucet can be restored to its normal functioning.
Here are the instructions on how to replace RV shower faucets. Before beginning the faucet replacement, it is important to shut off the water supply in the RV. It can typically be done by locating the shut-off switch on the main control panel of the RV. Once the water supply is shut off, the next step is to remove the old faucet. It can be done by using a wrench or pliers to loosen the nut on the shower faucet and carefully removing it from the wall or water pipes. After removing the old faucet, it is time to prepare the new faucet. It can be installed by inserting it into the wall or water pipes according to the provided installation instructions. The faucet should be secured with the nut, using a wrench or pliers to tighten it appropriately. However, it is important not to overtighten the nut to avoid causing damage to the faucet or its seals.
Once the new faucet is installed, the next step is to connect the hot and cold water pipes, depending on the design of the new faucet. It is essential to use appropriate sealing washers or plumber's tape to seal the connections and prevent any water leaks. After connecting the water pipes, it is time to turn on the water supply and check if the new faucet is working properly. It is important to check the water flow and temperature adjustment, as well as look for any signs of leaks. Finally, it is crucial to test and adjust the various functions of the faucet to ensure proper water flow, accurate temperature adjustment, and no leaks. If any issues are found during the testing process, prompt adjustments or repairs should be made.


 浙公网安备 33010002000092号
 浙B2-20120091-4